For the Best Mac Webcam, Use Your iPhone
The near-ubiquity of videoconferencing is a lasting effect of the pandemic and the ease of gathering a group virtually usually makes up for the downsides. However, video calls with low-resolution or poorly lit video can make the call less effective.
A better webcam is an easy way to improve your video; the best readily available webcam may already be in your pocket. Thanks to Apple’s Continuity Camera technology, you can use your iPhone and its high-quality cameras as a wired or wireless Mac webcam.
Your Apple gear likely meets the Continuity Camera system requirements. You need an iPhone XR or later (all iPhones introduced in 2018 or later) running at least iOS 16 and a Mac running macOS 13 Ventura or later. Both must be signed in to the same Apple ID.
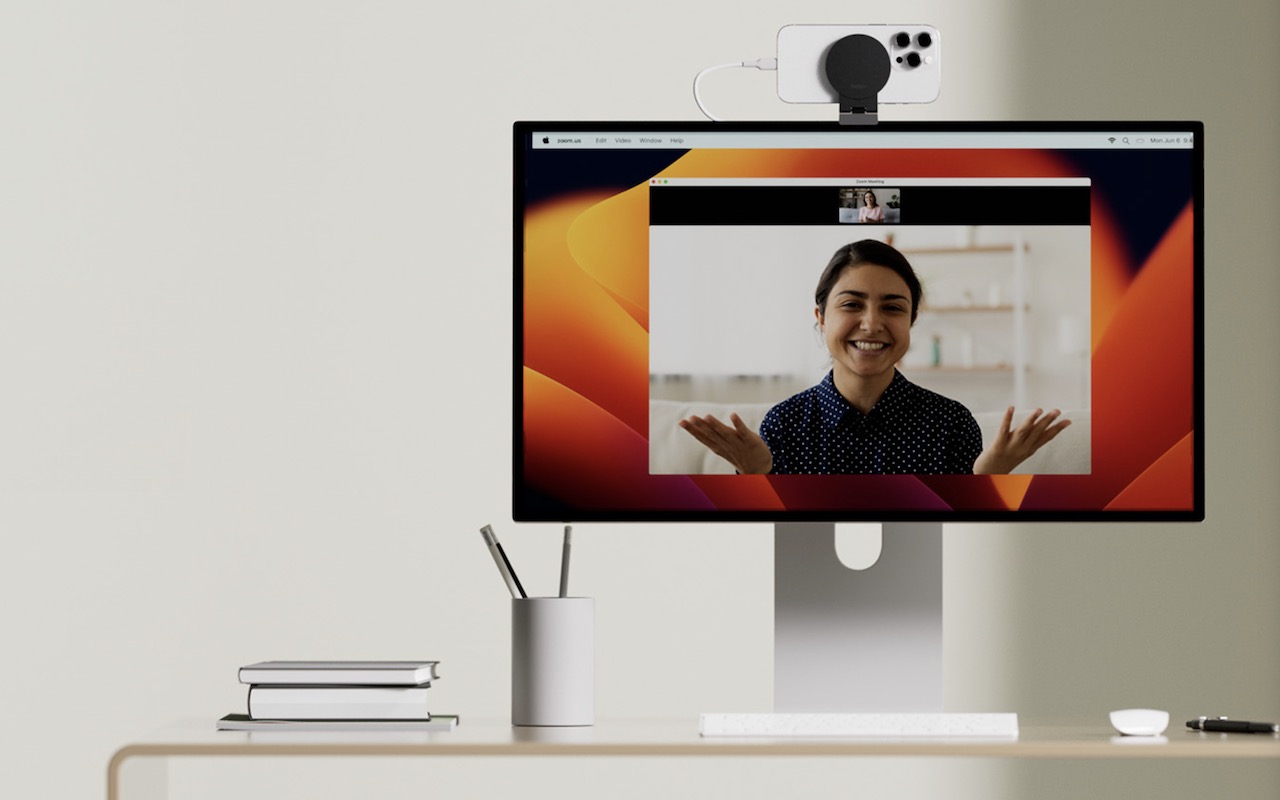
You’ll want a mount that holds your iPhone in landscape orientation (horizontally) at the top of your Mac’s screen, with its rear cameras facing you. The first such mounts for laptops and desktops came from Belkin, but numerous manufacturers now sell inexpensive alternatives with different industrial designs and support iPhones that can’t use MagSafe. Continuity Camera can drain your battery, so it’s worth plugging in a charger cable or getting a screen mount that holds a MagSafe charger; look on Etsy for options, such as this one.
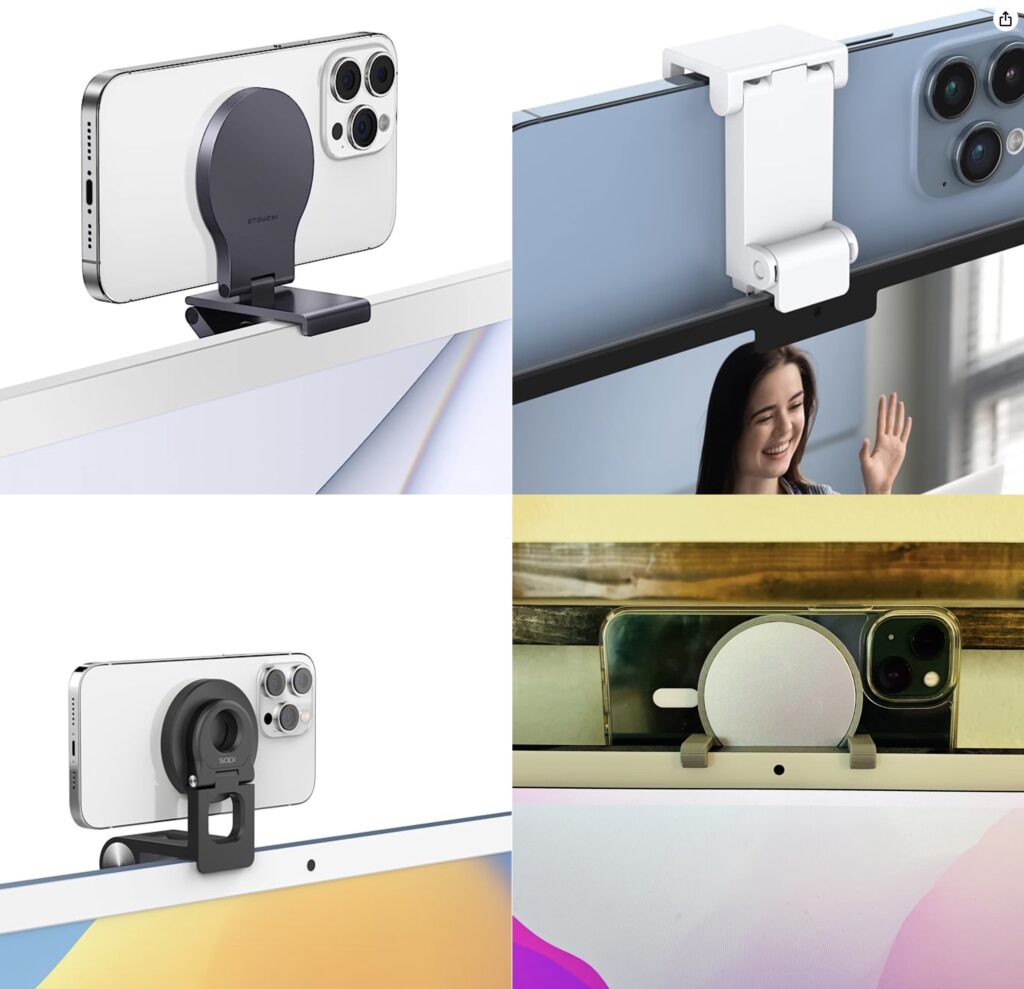
Although the samples above show the iPhone’s cameras in the upper-right corner, you can rotate the iPhone to position the cameras in the lower-left corner, which may put them more in line with your eyes and improve eye contact.
(Technically, you can put the iPhone anywhere—a tripod behind your screen would also work—and it doesn’t have to be in landscape orientation. However, apps detect the iPhone as a webcam automatically only when it’s in landscape orientation. If it’s below or to the side of your screen, the video angle will likely be problematic. You can also take your iPhone off its mount and walk around with it as long as you stay in Bluetooth range of your Mac.)
When the iPhone is locked and in position, its camera and microphone become available to videoconferencing apps like FaceTime, Zoom, and Webex. Your app may start using the iPhone as a camera automatically, but if not, look for a menu or icon that lets you choose the desired camera. Similarly, you can use the iPhone’s mic as your audio input for the call, although the Mac’s built-in mic, AirPods, or other mic may offer equally good or better audio quality.
For the most part, the iPhone acts like a standard webcam. After you end the call, just remove it from the mount to use it normally again. Should you need to check something on your iPhone during the call, you can remove it from the mount and either tap the Pause button or unlock it—your video (and audio, if you’re using the iPhone as a mic too) will pause. To resume, lock and remount your iPhone. You may want to warn the other people on your call first in case something goes wrong and you get disconnected.
Receiving a phone call is a similar situation. Answering the call on the iPhone pauses the audio and video for the videoconference until you end the call, lock the iPhone, and mount it again. You may also be able to answer the call on the Mac, but that also pauses the audio and video, and you may need to choose the iPhone as your camera again afterward.
Ultimately, using your iPhone as a webcam is remarkably easy—Continuity Camera works in our experience. The only tricky part is finding the best screen mount and charger with your Mac and usage patterns.
(Featured image by Belkin)

